This is a step-by-step guide on how to work with assignments/school work that are in PDF documents. This approach is an alternative to printing PDF documents, answering them on paper and scanning/imaging paper assignment for submission online. This guide is specific to using Google Suite for Education specifically Google Classroom on a tablet device (iPad specifically but steps applicable also to Android tablets).
Before starting, it would be good to be aware of the ideal setup when using an iPad or an Android tablet for Google Suite for Education. On a computer, the access to Google Suite for Education is via a browser, ideally Google Chrome, and the applications included in the Google Suite for Education is made available via your Google account through the browser. For iPads and Android tablets, the browser can also be used in the same way as you would on a computer. However, there are specific applications available on these devices that provide optimised utilisation of the Google Suite for Education. From experience so far, the set of Google applications that are best to have on an iPad or Android tablet for use in education are those show in the image below:

For this tutorial, we will focus on Google Classroom.
Step 1: Open Google Classroom
This is how the Google Classroom app looks like when logged on to your child’s Europa School UK Google Suite for Education account.
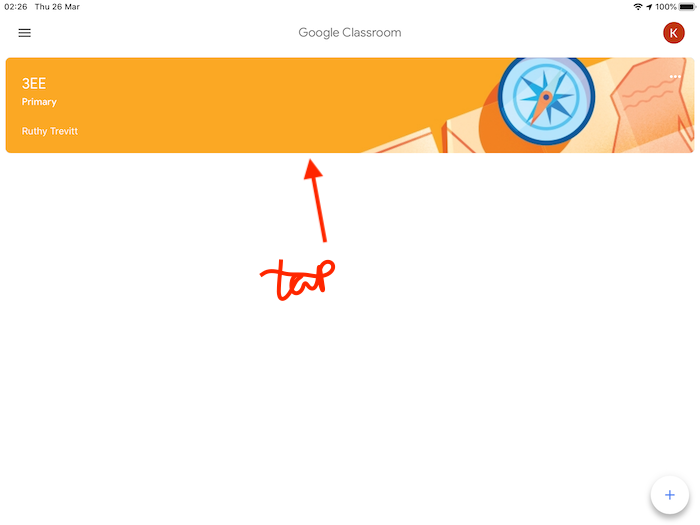
Tap on your child’s classroom which is usually identified with the Class name (in the example it is 3EE) and the teacher who created the classroom (in the example is is Mrs Trevitt).
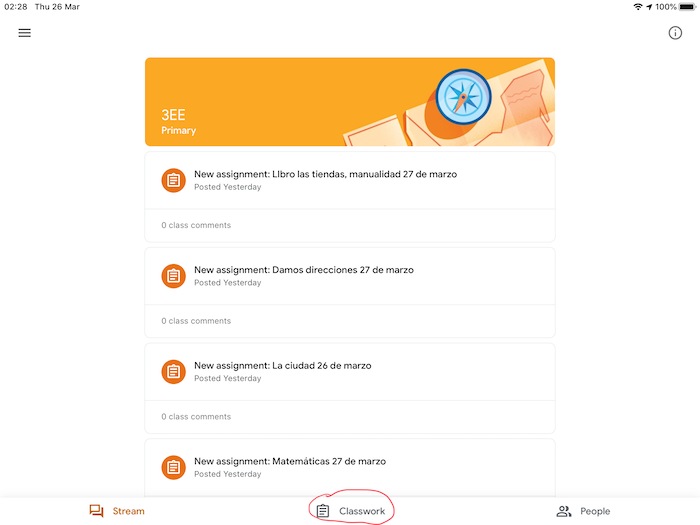
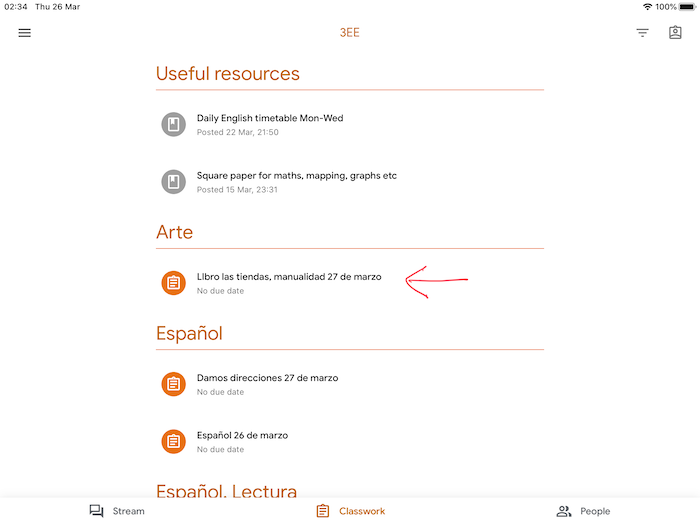
You will now see the stream of school work (see image below) that your child has been assigned with by the teacher/s. This is the default view of the classroom. This view is only good to see the full list of work that has been assigned and shows on the top of the list the most recent one that has been provided. However, this view can be daunting and overwhelming as there is no grouping structure and no differentiation of the different types of work. A better, more organised view can be had by tapping Classwork (see image below circled in red).
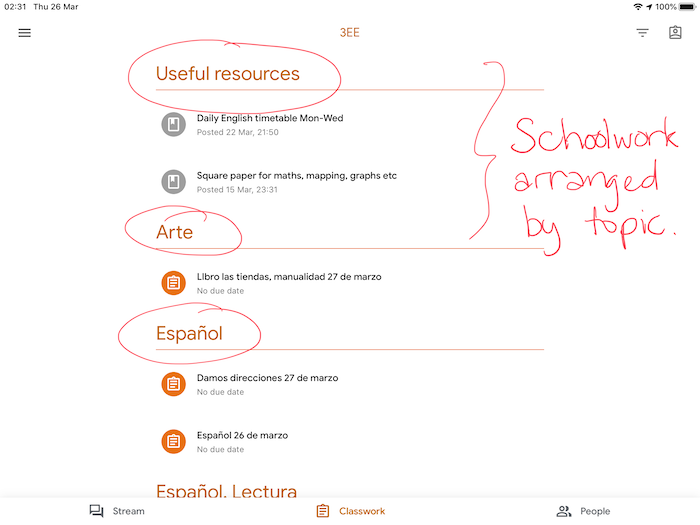
Once Classwork is tapped, you will now be able to see a more organised list of schoolwork (see image below). Schoolwork is organised by topic and/or by subject. This organisation is dependent on how the teacher/s have organised the schoolwork that they are providing and the types of topic headings that they are using. Mrs Trevitt has organised hers in terms of the week in which the schoolwork is meant/expected to be worked on and added a topic on useful resources and on project. Srta Sofia on the other hand organises her topics based on the different topics covered in Español - Matamatica, Discovery of the World, Arte, Español.
Step 2: Tap on a school work
For this tutorial, we will look into the schoolwork for Arte provided by Srta Sofia. The specific schoolwork is titled “Libro las tiendas, manualidad 27 de marso” (see image below). Tap on this schoolwork.
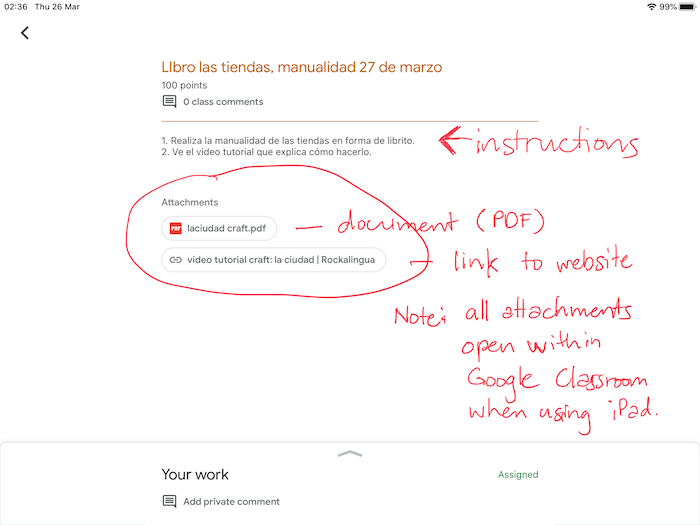
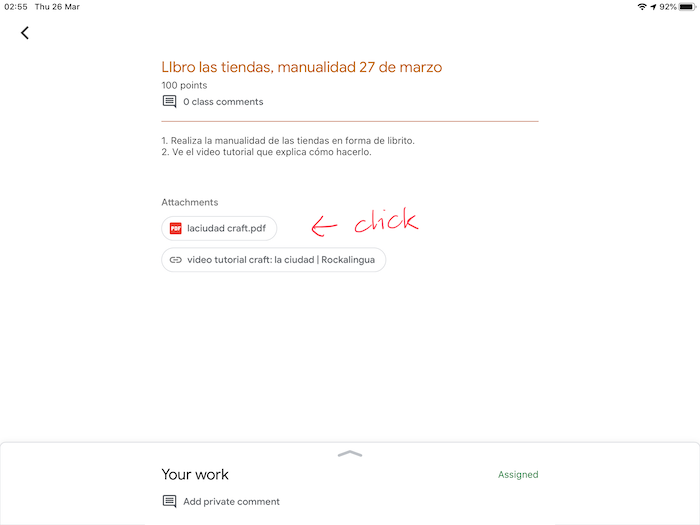
Now you will see the details of the schoolwork (see image below). There are instructions provided and there are 2 attachments to the schoolwork. One is a PDF and the other is a website link. For this tutorial, we will focus on the PDF document.
Note that when using an iPad or an Android tablet and using the Google Classroom application, the attachments when tapped/clicked will open within Google Classroom. So, a PDF will be opened in a PDF reader included within the Google Classroom application. When hyperlink is tapped/clicked, it will open in a browser built in to the Google Classroom application.
At the bottom of the schoolwork screen, you will see a footer saying “Your work” with an up arrow on top (see image below). You can access this part of the schoolwork by doing a half-swipe up or a full-swipe up.
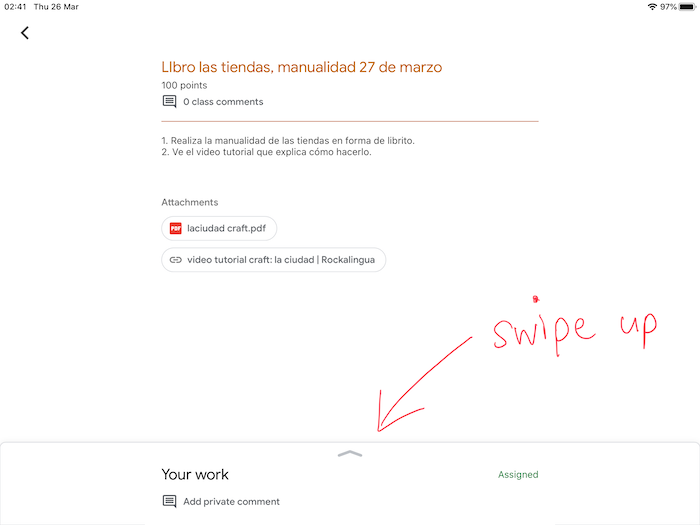
When you do a half-swipe, you will see this:
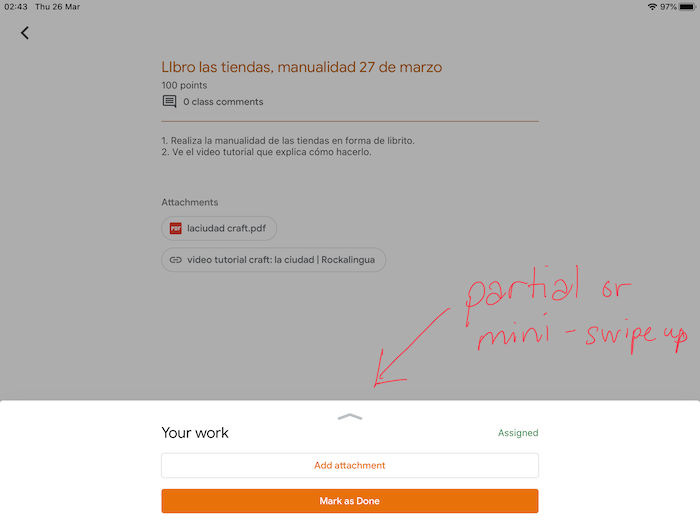
If you do a full-swipe, you will see this:
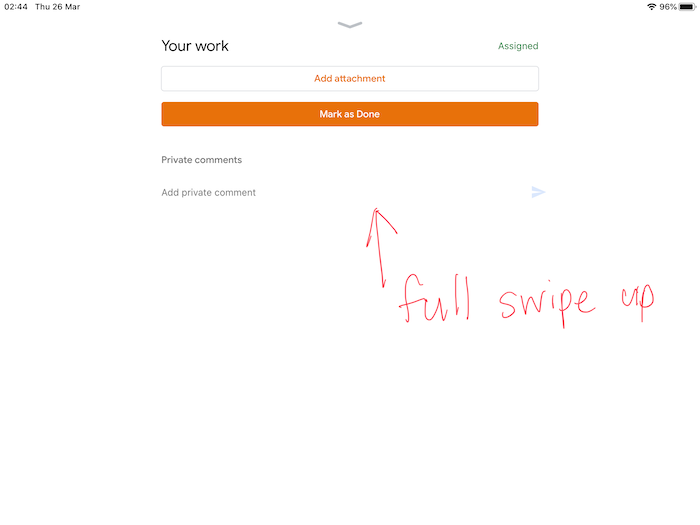
Either way, you get the similar view and options. You will see the “Add attachment”” button and the “Mark as done” button.
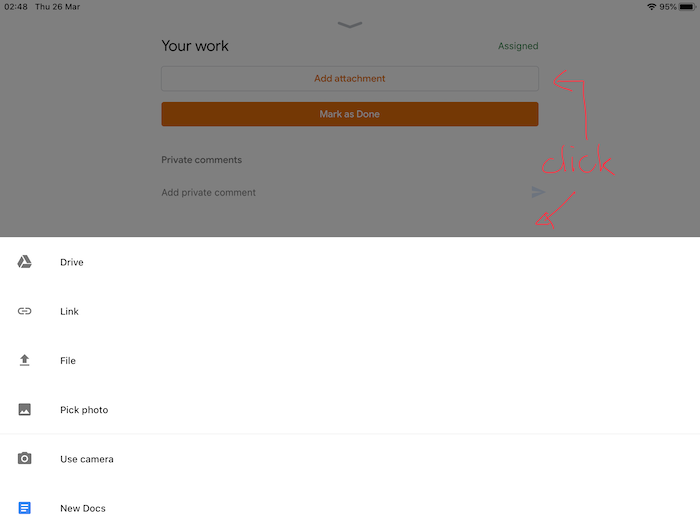
The “Add attachement” button is there for use in attaching a student’s work for the specific assignment. When clicked/tapped, it shows the various options of files that can be added as an attachment (see image below). For most of you, you would have used this to submit scans/photos of work that your kids have made.
Now, close these options for now and swipe down the “Add attachment” footer to get back to the main view of the school work that we are looking at.
Step 3: Click/tap on PDF attachment provided by teacher/s
For our example, tap on the PDF titled “laciudad craft.pdf” (see image below):
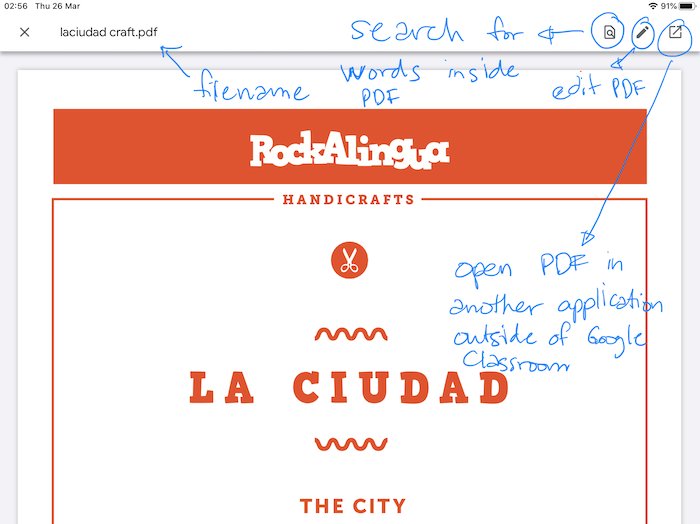
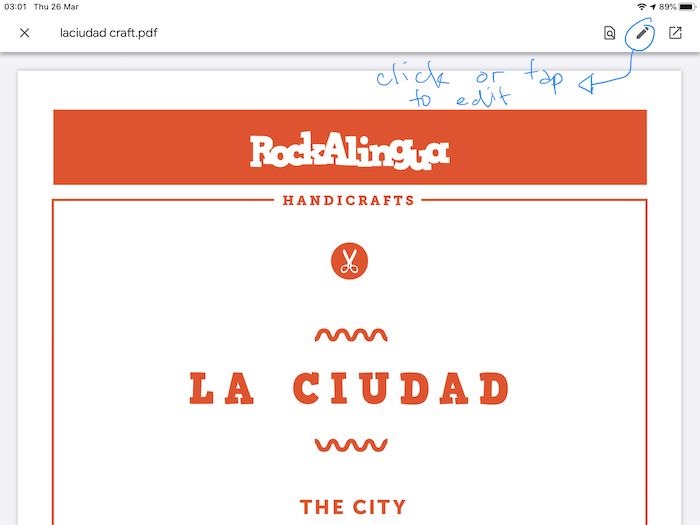
You will then see the PDF in the viewer that is builtin Google Classroom (see image below). This is the view mode of the PDF. You can search for keywords within the PDF, you can open the PDF outside of Google Classroom using another PDF viewer and most importantly you can edit the current PDF.
Step 4: Click/tap on the pencil/edit icon on top right
The edit mode can be accessed by clicking/tapping on the pencil icon on the top right of the PDF view shown in the previous image.
When tapped, you will see the following view:
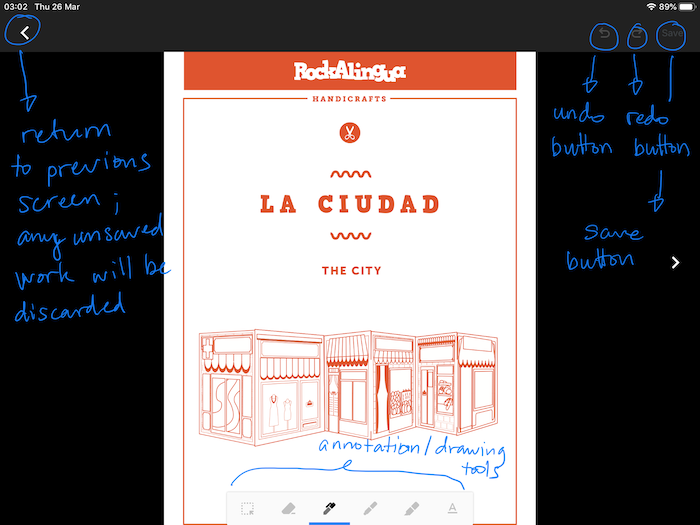
You will see on the top right a undo and redo button and a ‘SAVE’ button. On the bottom edge you will see a writing/drawing tool set.
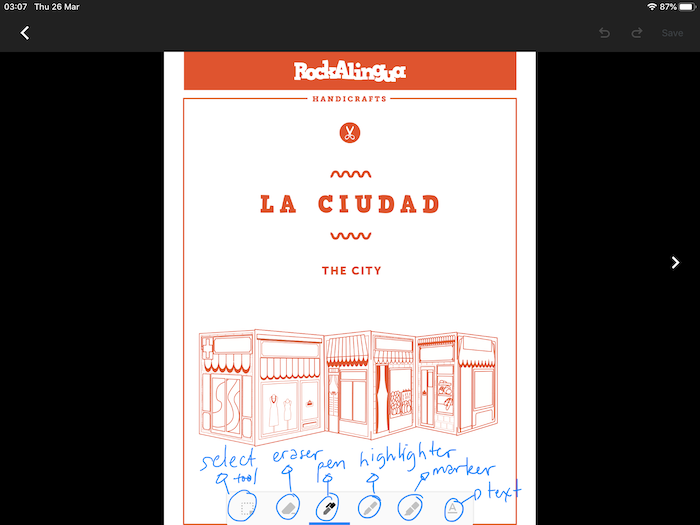
The writing/drawing tool set will be your most important tool for editing the PDF. The tools available are shown in the image below:
To get more options for the tools, swipe up on the tool box (see image below):
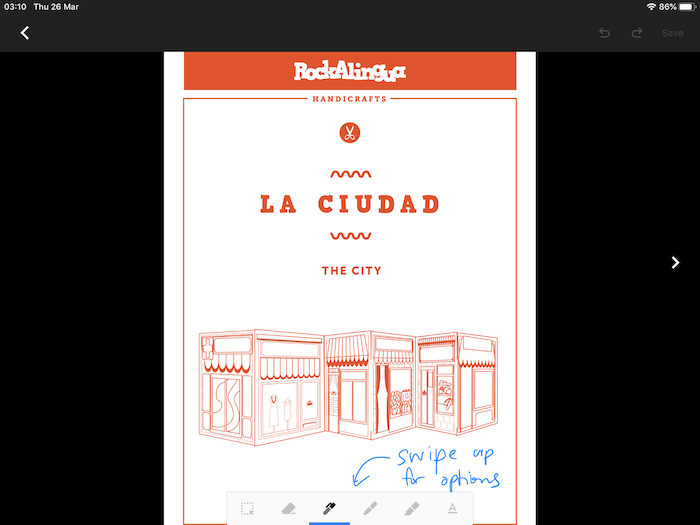
You will then see the other options available for the specific tool you are using. In the image below, it shows the other options for colour and for stroke size for the pen tool.

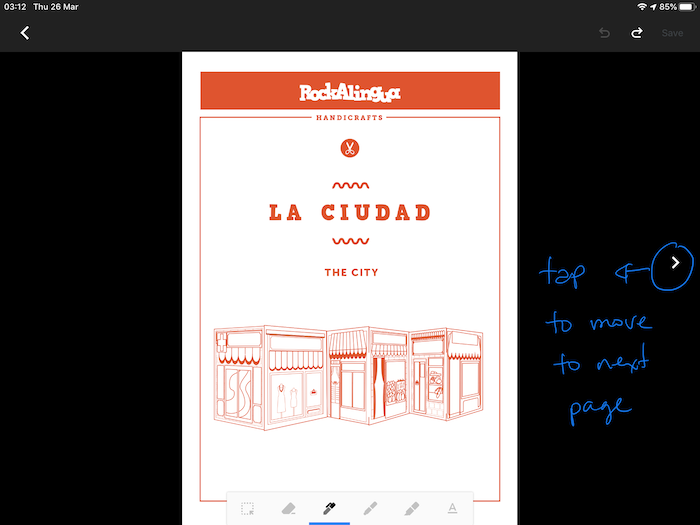
For multipage PDFs, tap on the buttons on the left or right hand side of the current view to switch pages (see image below):
When on editing mode, you might want to zoom into a specific part of the page or move the page up or down or left or right to change your view of the page. To do this, use two fingers all the time and then make a pinching movement with your two fingers to zoom out and move your two fingers away from each other to zoom in. Move your two fingers up to move up, two fingers down to move down, two fingers left to move left, two fingers right to move right.
Step 5: Editing your document
You can now start editing the document.
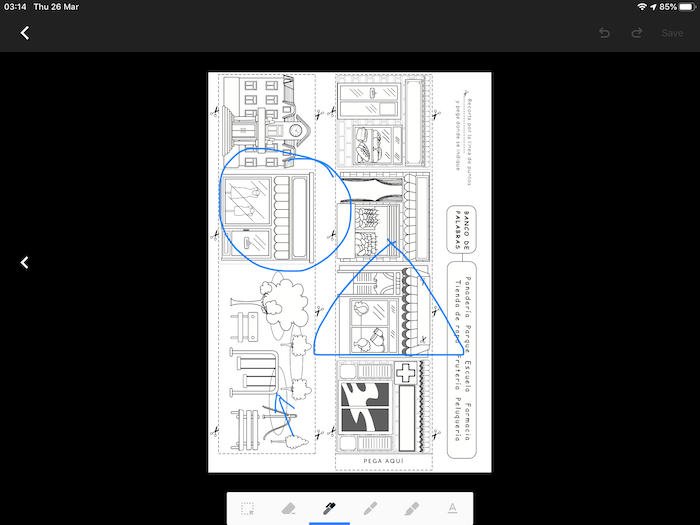
The most useful tools for editing are the pen tool which can be used to draw, add marks or shapes on the document see image below) using your fingers.
If you have a stylus or a digital pen, you can do all those and you can also write text to answer questions that require writing text.

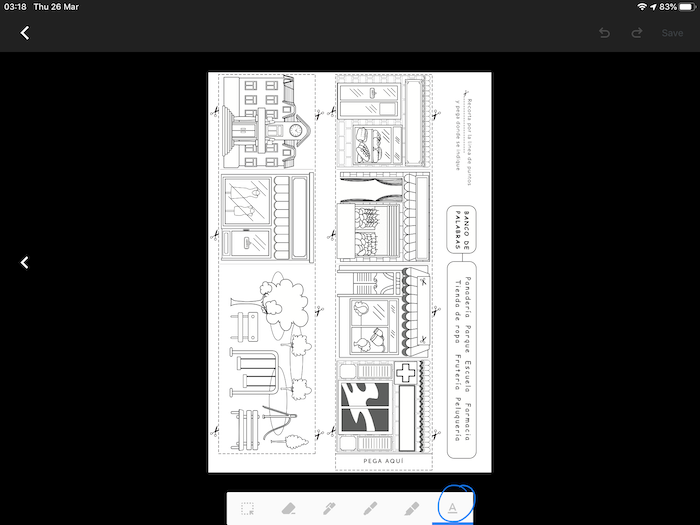
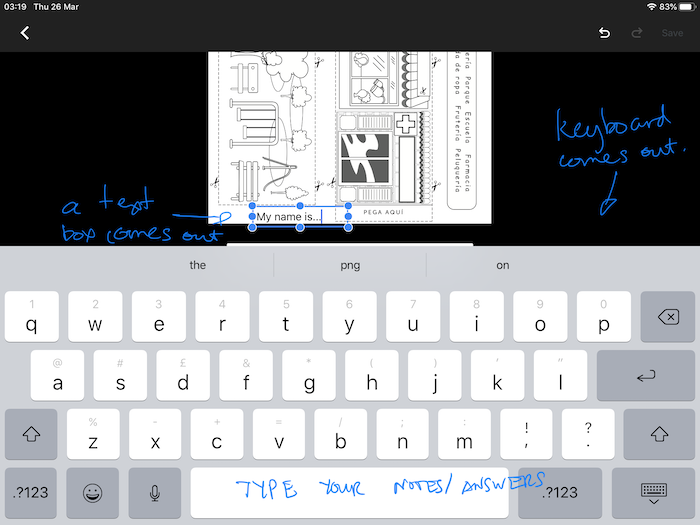
The other tool that is most useful is the text tool which can be used to enter text if you do not have a stylus or a digital pen.
The other tool that is most used is the eraser to remove any marks that you need to remove. If your child wants to colour their work, the marker and the highlighter tool can be used for this.
Step 6: Save your work
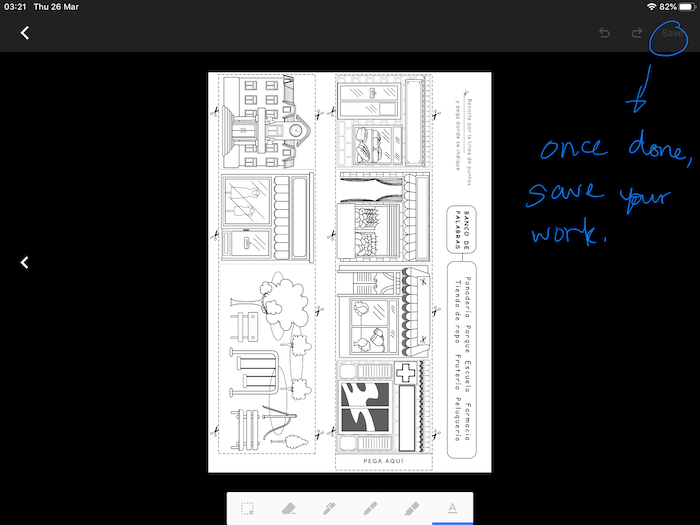
When you are done with your work, tap on ‘SAVE’ button on top right corner (see image below):
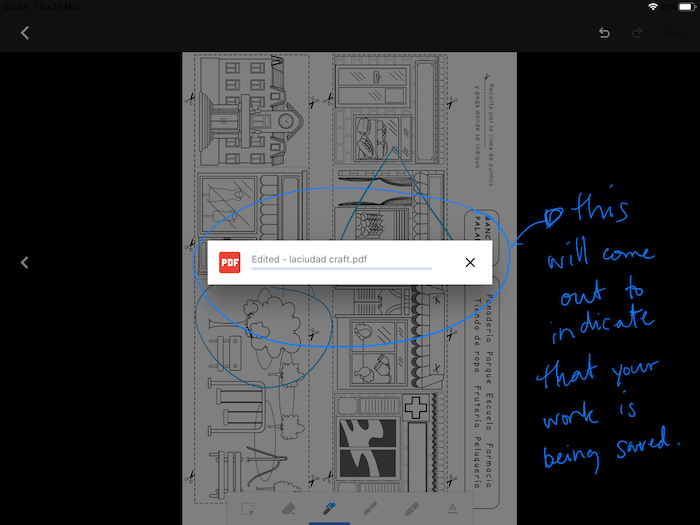
You know that your work is being saved when you see the image below. Note that the filename for the document has been appended with the word “Edited - ” at the start. This differentiates your work from the original file that you edited. Your work is saved in your Google Drive.
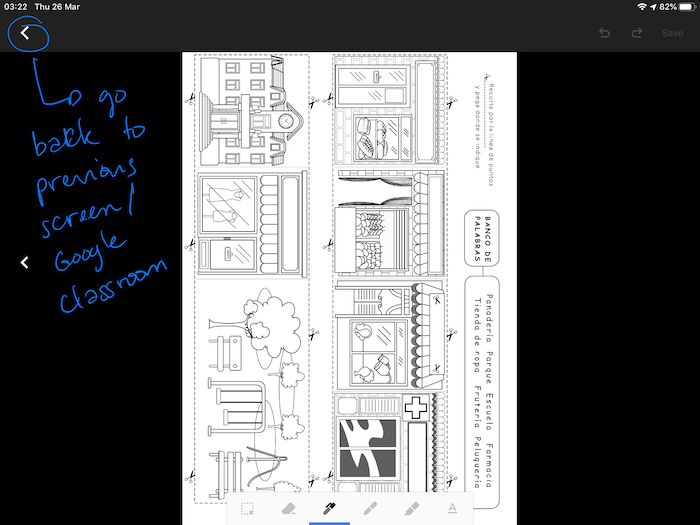
Once saved, you can go back to the main view of the schoolwork by tapping on the top left arrow button (see image below):
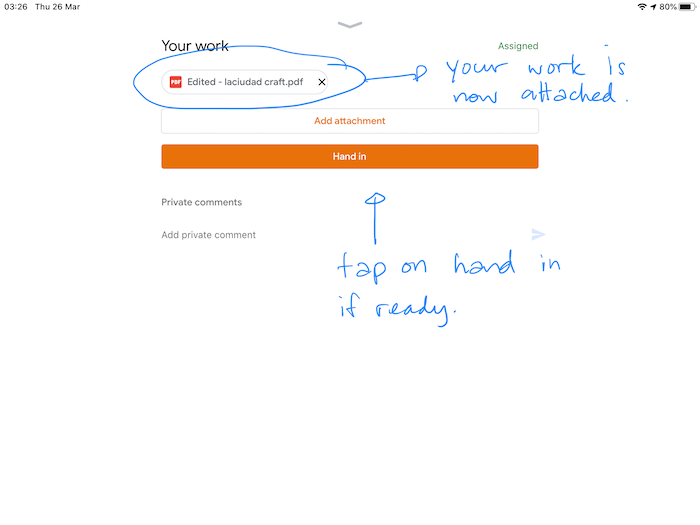
You will then see that your work is now attached in the “Your work” section of the application. You can now tap on “Hand in” to submit.